How To Create The PERFECT Workout
Written by Frank Rich on August 8, 2018
Programming your own workout can be an overwhelming task.

A quick Google search on, “How To Create A Workout Plan” will yield you 276 million results.

So where do you start?

Well you can be like the majority of the population who spend hours a week in the gym without getting any results and just go in everyday without a plan, hoping that by sheer luck, your presence in the gym will guide you in the direction of achieving your goals.

But let me remind you that, Hope is not a course of action, and creating a goal without a plan is nothing more than a wish. 
The first thing you must do before creating a plan is establish EXACTLY where it is you are trying to go, then reverse engineer the steps it will take to get you there.

Today we are not going to go into detail on the process of goal setting… we’ll save that for a later date.

So assuming we are all on the same goal, and that goal is building as much muscle as possible, I’m going to take you through the steps of creating the perfect workout plan. This approach can be replicated for every single body part, and once you master the principles, you can walk into any gym in the world, and as long as you know what muscle you are training, be able to take yourself through an extremely efficient and effective workout.

What we are going to cover here is not specific exercises, reps, or set schemes, but the thought process and logic of how you select your exercises, because in my opinion, the order in which we complete our workout can be one of the greatest advantages we have to improve and transform our physiques.

You see, the muscles in our bodies have a very distinct ability to produce output, and there are points in every movement or exercise where we are really strong, and points where we are going to be weaker. This is known as our body’s strength curve.

And at the same time, every exercise or movement has certain points where the weight and load is heavier, or more challenging, and also points where the load will seem lighter. This will be dictated by the type of resistance (free weight, machine, cable), as well as joint angles and moment arms (the distance from the axis of the joint that is moving). This is known as the resistance curve. 
The better our ability to select exercises that match our body’s strength curve to the natural resistance curve of those exercise will lead us to producing higher quality output contractions, having more efficient workouts, saving time, and ultimately building more muscle. 

This process consists of 5 steps, not carved in stone as they can be tweaked based upon a certain person’s needs or goals, or even training experience. But if you are unsure of what to do, or just getting started in transforming your physique, this exact outline can be used every single time you walk into the gym and will guarantee that the time spent there will bring you closer to your goals. 

I will explain each step and the thought process behind why it is placed where it is, then provide examples of exercises that fit the description. 

So without further ado… 

I’d like to introduce you to the Precision Hypertrophy Principles (PHP). 

Step #1 - Activation 

This is the “warm-up” period of our workout, except, I don’t care what your body temperature gets to, all we are focused on is producing contractions within the muscles we are training and establishing a strong mind-to-muscle connection.

The better your ability to contract muscles now, with minimal load, will lead you to creating and keeping more tension in the muscles during your workout.

This step should be no more than 6-8 minutes of work. All you are trying to do is assess your range of motion and then take that muscle through the full range of motion, with a very light load or resistance.

A resistance band is a great tool to have here, and an example of an activation exercise would be attaching the resistance band to something that is fixed, then simulating a single arm chest fly, bringing your upper arm as far across your body as possible.

Step #2 - Flatten the Strength Curve
Once your body is primed and your muscles are activated it's time to get to work.

And think about it, the beginning of your workout before you exhaust or fatigue any of the muscle fibers is your greatest opportunity to produce output.

When we use the term, Flatten the Strength Curve, what we mean is find the movement or exercises that have the most consistent resistance profile - they are evenly as challengeable throughout the entire range of motion.

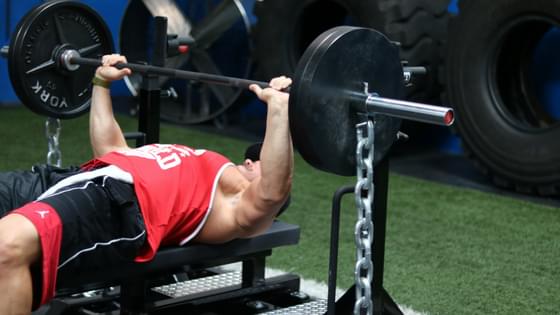
If you have the ability to add bands or chains to an exercise this would be the time to do it. Bands and/or chains are referred to as accommodating resistance. As the bands lengthen, or stretch, that add resistance to the exercise, making the load appear heavier at points where the muscle is stronger. (Here is a video I posted on the Top 3 Banded Exercises for Chest)

Same logic applies with chains. You will want to set the chains up so as you descend in a movement like the squat, the chains will pile up on the floor, and as you push through the concentric, the chains lift off the ground, adding more load to the movement.

If you don’t have bands or chains that is fine, just select movements that have the best profiles.

Squats of hack squats for legs over leg press. The leg press has a very short range due to the setup.

Dumbbell press over dumbbell fly or bench press for chest. The dumbbells allow you hands to move more freely over a bench press which is in a fixed position, limiting the horizontal adduction you can get with the upper arm (humerus). 

This is also the time you want to work stabilization muscles so try and stay away from fixed machines such as a chest supported row or preacher curl, we’ll have a time for these exercise later. 

Step #3- Weak Body Part Training
Being honest with ourselves here, we all have areas of every muscle we wish were bigger, or looked better. 

That’s ok, we just need to give priority and special attention to those areas. 

And now is the time. 

Depending on the individual and body part, this step can be combined with step #2, but either way, you want to make sure to train this “weakness” early in the workout. 

So for example, you want to add thickness to your biceps, here is the time to do hammer curls. 

Or your hamstrings need more attention than quads, well there are tons of options with great hamstring exercises, just pick 1-2 and place them here. 

Want to build your upper chest? Incline pressing or fly movements is what you need. 

I think you get the point… 

It’s just important to work these areas early in the workout. Too often I speak with people and they tell me they have a weak body part that they can’t seem to grow, and after digging into their routine a little, I come to find out they are just throwing in an additional 4 sets of an exercise at the end of the workout.

Well obviously, if you train hard and with intensity, there isn’t much left in the tank by the end, so any effort put into that weakness will be minimal at best. 

Step #4- Metabolic Work (Density Training)
If you read one of my previous articles on Progressive Overload then you know that one of the best ways to overload a muscle without using more weight is by adding in or using density in your training.

When you increase density, you are getting more work done over the same period of time.

This can be accomplished a few different ways:

       1. You can use supersets, tri-sets, giant sets, drop sets, rest pause, etc. Any intensifier                             technique that allows you to extend a set further than you would be able to take it on its                   own.

       2. Shorten your rest periods. If you were resting 2 minutes in your previous exercises, cut that          to 60-90 seconds here.

For me, this is the time I like to utilize supersets and tri-sets.

It allows me to accomplish multiple goals at once. First, I can increase the metabolic demand of the workout. But also, I can pick complementary exercises that work the muscle through the fullest range of motion.

Another thing you can do is if you are working agonist and antagonist muscles, or opposing muscles such as chest/back, biceps/triceps, you can select 2 exercises that work each of these and do them together here.

The reason why we’re placing this principle here, later in the workout, is because we have fatigued many of the fast-twitch muscle fibers responsible for strength and explosiveness, but still have the opportunity to work out slow-twitch, which are responsible for muscular endurance.

Step #5- “Finisher” (Stabilized Movement)
By this point in the workout if we’ve followed the steps above and trained with solid execution and effort, we have put ourselves through a pretty good workout.

We trained stabilization, hit the muscle in both points of the extremes with the range of motion (fully lengthened and fully contracted), we’ve trained any weakness or lagging area, we’ve overloaded the muscle, and have done some metabolic work, so when it comes to selecting a “finisher”, we don’t want anything that is too demanding in those areas.

Select an exercise that is a stabilized environment, meaning its probably in a fixed machine.

You also don’t want anything that is going to overload the stretched or contracted position, so a movement that really works the muscle through the mid-range.

Some perfect examples are a chest supported back row. The seat and chest support provide stabilization for your torso and spine and all you need to focus on is rowing through the back.

For quads, the leg extension is a great option here. You are locked in to the seat, and the only thing you need to think about is extending at the knee and contracting the quads.

My all time favorite exercise for chest as a finisher is floor press. The floor provides all the stability you need, and you can focus on moving the weight with the pecs.

But that’s it… just remember, the final movement in your workout is not to make or break your workout, you should have caused the majority of the muscle damage already by this point. Here, all you want to do is work those last few muscle fibers that maybe haven’t been hit yet.

So there you have it, the exact thought process and principles for what you need to be doing to create the PERFECT workout every single time you walk into a gym.

By following these steps, you will ensure that your training is as efficient and effective as it can possibly be, and you’ll be well on your way to building your greatest physique.

If you are interested in finding a program that is already written for you, check out my 12 week muscle building program, Massthetic Muscle, which is written using these Precision Hypertrophy Principles.
All Your Information is Protected When You Sign Up
FB Comments Will Be Here (placeholder)


About Author:
 
Frank Rich
Frank Rich is an online fitness entrepreneur, fitness author, certified trainer & nutrition coach, and bodybuilder. He has close to 2 decades of training experience himself, and has helped thousands of men around the world build muscle, lose fat, and transform their lives. Frank has dedicated himself to helping 100,000 men build what he defines as a MASSTHETIC PHYSIQUE. 
 Free 7-Day Workout
ADD 1 INCH TO YOUR ARMS IN JUST 30 DAYS
Follow @frankrich_fitness on Instagram
CUSTOM JAVASCRIPT / HTML
Related Articles
12 Principles Of Progressive Overload
Unless you are completely new to resistance training and the idea of building muscle, then you have definitely heard the following statement before... [Read More]
Why You SHOULD Train 2 Days In A Row
So here we are, it’s a new week and you’re ready to get back into the routine of hitting the gym, either first thing in the morning or after a long work day. [Read More]
The Curse Of NOW
Time is an asset, maybe our greatest asset, as we can never get it back, so we need to pay close attention to how we either invest or spend our time. [Read More]
Copyright © 2018. Frank Rich Fitness. All Rights Reserved.